In the studio again! This time Nat worked with Catie and friends Gillian and Helen, using the amazing art of Robert Rauschenberg as inspiration. They found images from popular culture, and arranged these to create compelling compositions. Paint helped to unify the disparate images. They also learned how to transfer images using gel medium. Take a look and let us know what you think.
Wednesday, September 8, 2010
New Work - Robert Rauschenberg style
In the studio again! This time Nat worked with Catie and friends Gillian and Helen, using the amazing art of Robert Rauschenberg as inspiration. They found images from popular culture, and arranged these to create compelling compositions. Paint helped to unify the disparate images. They also learned how to transfer images using gel medium. Take a look and let us know what you think.
Monday, July 26, 2010
Discovering Beauty and Inspiration
Prettiness can be found everywhere (well, at least almost everywhere):
Where do you think the idea for this painting came from?
This, of course!
Sunday, July 18, 2010
It's a Jungle of Bricks...
Today I created five super awesome trees:
This one I call the Zebra Trunk, for obvious reasons (;
This is a Snowball Tree. The trunk is hard to see because it's clear.
A Palm Tree...
And my favorite, the Sycamores.
These trees are pretty easy to build. The main trick is to be random in your placement of bricks, but make sure to keep a good shape.
Want more awesomeness?
Leave a comment.
Check back soon!!! (: (: (:
Tuesday, June 15, 2010
Balloon!!!
Get Ballooned!!!
This is a super cool, easy and awesome way to make a fun 3D sphere.
And it's interactive~
Step one: Fold your paper diagonally (both ways)
Step two:
Unfold that and fold your paper in half (both ways)
Step three:
See that crease in the middle of your folded (in half) rectangle?
Yeah. That one. Now fold the rectangle in half again to make a square, and hold down everything to the left of that crease and open up the right side like this:
Keep opening... keep folding...
and flatten!
Step four:
repeat on the other side.
Step five:
Find the bottom corner of the triangle and fold it to the top of the triangle:
Do this on all sides to make a square.
Step six: take the outside flap of one side of the square and fold it to the crease in the center.
Do this to the other side as well.
Step seven:
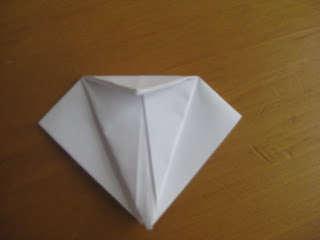
If you turn around so the top of it is facing you, you will see a flap on top.
On the same side, open up the flap on the side.
Step eight:
Put the to flap into the side flap like a hand into a pocket.
Now flatten it (please, don't want to be bossy (; )
And repeat to the other side.
Yay! Now just do the exact same thing on the other side...
Step nine:
Turn your little project upside-down and find the small opening:
I'm going to sound crazy, but put your mouth on it.
BLOOOOOWWWW!
PHHHHHHHHHHHHUUUUUUUUU
inflate!
Pop! You created a balloon!
(I honestly don't think it will float if you put helium in it, sorry )
Check soon for more awesome Origami!
Thursday, June 3, 2010
More Paper Crane Info
Here is another way to get to step four, because people are having trouble with the other instructions-
Step one: fold your paper to make a triangle
Step two: fold a triangle out of your triangle
Step three: unfold back to the first triangle a little, and open the space to the right of the second triangle's crease.
Flatten it into a square, then repeat on the back.
Monday, May 31, 2010
Paper Cranes!!!
First, you have to know these are awesome...
This?
These are of course: Paper Cranes (notice the name of the post)
You can make them look cool in pictures
If you have motivation, keep reading...
- -
It's folding time!!!
Grab a square.
Step one:
fold diagonally both ways
Step two:
Do the same, except in half un-diagonally
Step three:
Attempt to push the sides in (sounds confusing ): )
And press on it to make it stay
Step four:
rotate the point to the top and fold the outsides in like this:
After that, unfold all that you just did and lift up the bottom.
fold in the left and right sides.
Do it on the flipside, too
Step five:
Fold the sides in again like this (both sides)
and fold down the top
Wings!!!
Step six:
fold the flap (wings) over, making them flat and revealing this:
Step seven:
Fold it up, and fold back to the wings. Try and pull your new tail out a little.
Step eight:
now do the same thing to the other side, and fold down the very top just a little. This is the head.
Step nine:
Once again, fold back to the wings and pull the head out slightly.
Step ten:
Pull on the wings (gently (: ) and out to the sides...
And Voila!
You gotta crane (: (: (: (: (: (: (: (: !!!!!
Check back soon!
Subscribe to:
Posts (Atom)